
Bead loom weaving for beginners
Updated November 18, 2026
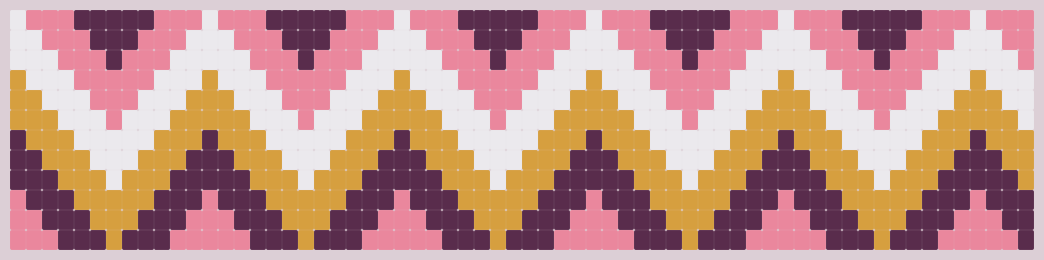
A bead loom holds a set of parallel threads under tension while you add beads one row at a time. The result is a flat band with beads in a straight grid, which makes it a good fit for bold geometric bracelets and for wide pieces that would take a long time by hand. It is also one of the easiest ways to start, since every row works the same way.
What you need
- A bead loom. A small wooden or metal loom is plenty for bracelets.
- Cylinder beads, such as Miyuki Delica 11/0. Their even size keeps the rows straight. Browse every color in our Delica color chart.
- Beading thread, such as a nylon beading thread or a braided thread. Pick a color close to your beads, because the warp can show at the edges. More in our thread and needles guide.
- A long beading needle. A longer needle lets you pick up a full row of beads at once.
- Small scissors, and a mat that stops beads from rolling away.
How a loom works
Two sets of thread do the work. The warp threads run the length of the loom and stay still. The weft thread carries the beads and passes back and forth across them. Each bead sits between two warp threads, so you always need one more warp thread than the number of beads in a row. A band 12 beads wide needs 13 warp threads.
Step by step
- Cut the warp. Measure the length of your piece, then add about 30 cm (12 in) for tying on and finishing. Cut one thread per warp, or follow your loom’s own instructions for winding.
- Tie on and space the threads. Tie the warp to one end of the loom, lay one thread in each groove of the spacing coil or comb, then tie off firmly at the other end. The threads should be taut enough to feel springy.
- Attach the weft. Cut about 1.5 m (5 ft) of thread and tie it to an outer warp thread near the end of the loom, leaving a 20 cm (8 in) tail.
- Pick up the first row. String the beads for row one on the needle, in chart order.
- Weave the row. Bring the beads under the warp and push them up so that one bead sits in each gap. Hold them there and pass the needle back through all the beads, this time above the warp threads.
- Pull snug and repeat. Gently pull the weft until the row sits straight. Your thread now comes out on the opposite side, ready for row two. Push each new row against the last one.
The most important detail is step five. If the needle passes under a warp thread on the way back, the row will not lock in place.
Adding thread and finishing
When about 15 cm (6 in) of weft remains, weave it back through a few rows, changing direction once or twice, and trim it. Start a new thread the same way, a few rows back, so that it comes out of the last row you wove. For a band that gets a lot of wear, add a half-hitch around a warp thread, as shown in how to add and end thread.
When the band is complete, cut it off the loom, leaving long warp ends. You can then finish it in one of three ways:
- Weave in each warp thread a few rows, and trim it. This is the neatest finish, though it takes the longest.
- Add a fold-over or slide-tube clasp, which covers the ends.
- Knot the warps in pairs and glue them to a backing, such as leather, for a quick and sturdy finish.
How to read a loom chart
A loom chart is the simplest kind to read, because the grid on the chart is the grid on your piece. Each row of the chart is one pass of the weft. Work from one end and follow every row in the same direction, so that the pattern does not come out mirrored. Mark each row as you finish it.
Check the chart’s orientation before you start. Many band designs are drawn sideways to fit the page, so a row may run from the top of the chart to the bottom. Our guide on how to read a bead pattern explains color keys, lettered charts and word charts.
How to size a bracelet
In loom weaving the bead holes run across the band. With Delica 11/0 beads, that gives you roughly:
- Width: 7 to 8 beads per centimeter.
- Length: about 6 rows per centimeter.
Measure your wrist, add ease so that the band moves freely, then subtract the length of your clasp. Weave a few rows and measure them before you commit to a long piece. To skip the arithmetic, the bead calculator gives you the beads per row, the number of rows and the total to buy.
Common beginner problems
- The band gets narrower. The weft is pulling the edges in. Check the width against the first rows as you go, and relax your pull at each turn.
- A row is loose or falls out. The needle probably went under a warp thread on the way back. Unpick that row and pass above the warp again.
- The warp threads go slack. Retie the warp more firmly. Slack warp makes uneven rows, and it does not improve as you weave.
- The rows look wavy. Uneven beads are the usual cause. Set aside any bead that looks narrow or thick.
Where to go next
Start with a simple repeat such as a chevron, where each row follows the same rhythm. Once your edges are straight, try a wider band with a picture motif, such as our free daisy loom bracelet, or browse all our free patterns. If you like the grid but would rather work without a loom, square stitch follows the same charts with just a needle. For a staggered fabric, peyote stitch is the natural next step.